4K Stabilized Surgical Head Camera light System / 4K Stabilized Surgical head-mounted imaging system (4K Coaxial Surgical Head Camera light system)
 1. Product Overview
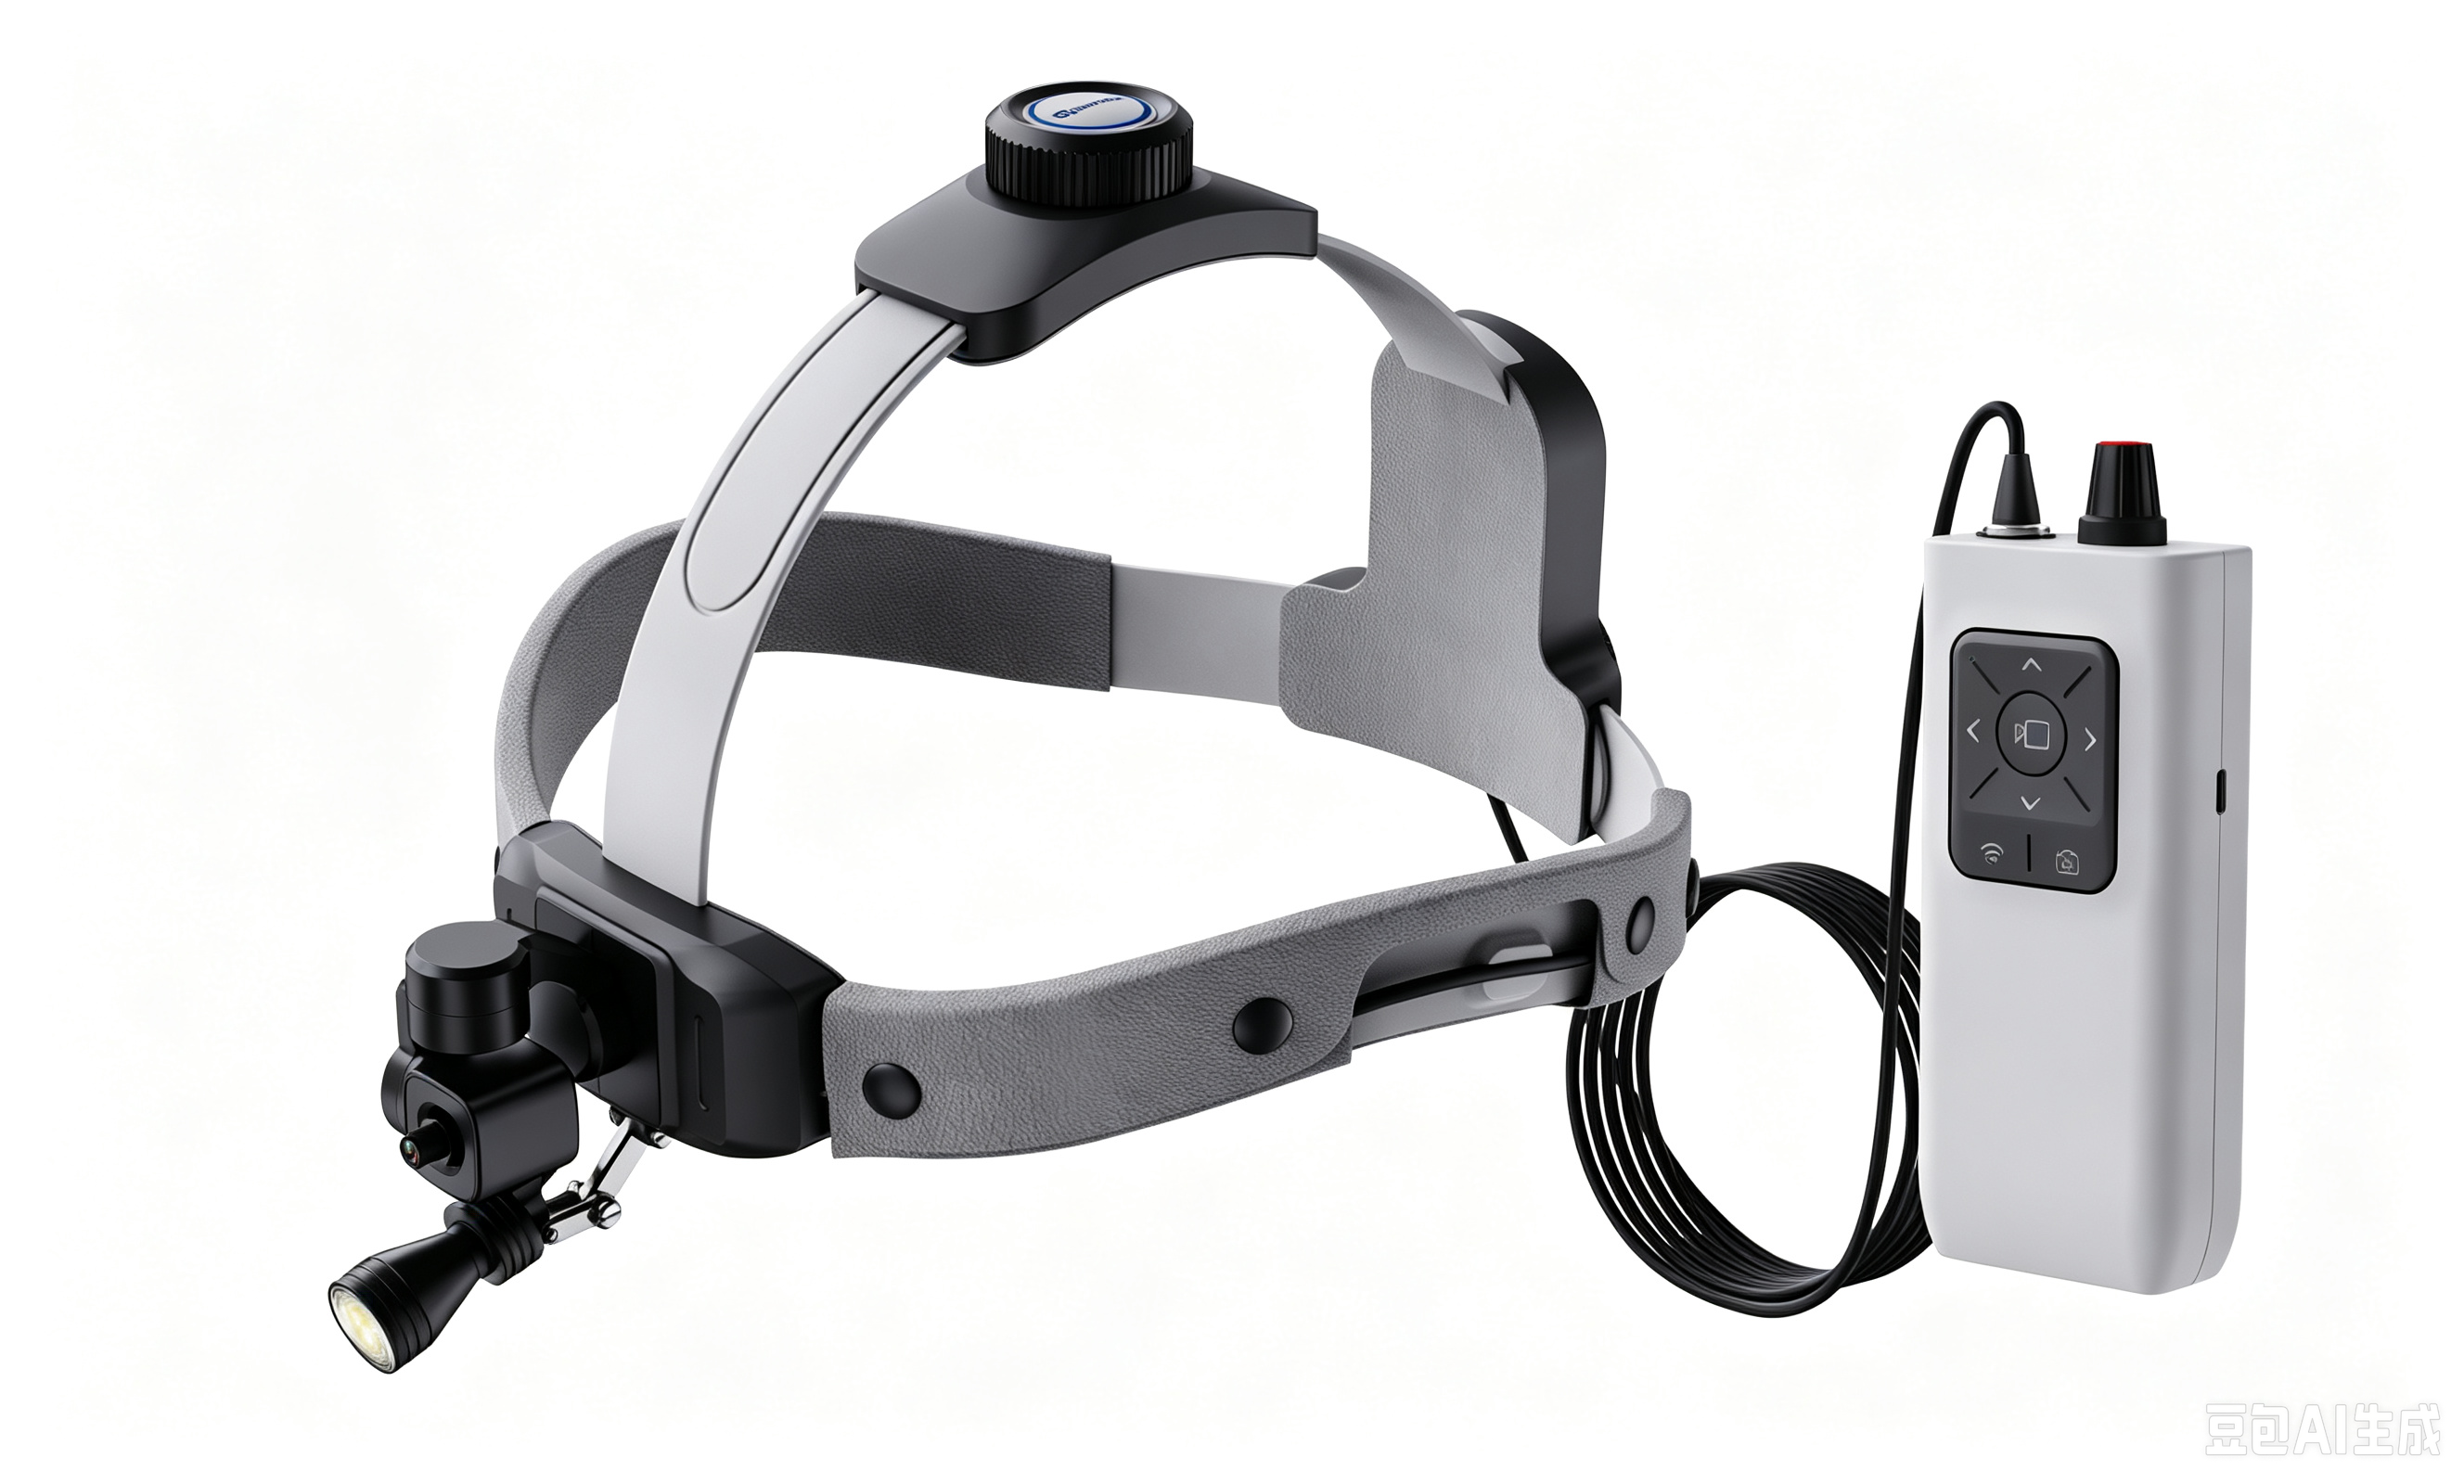
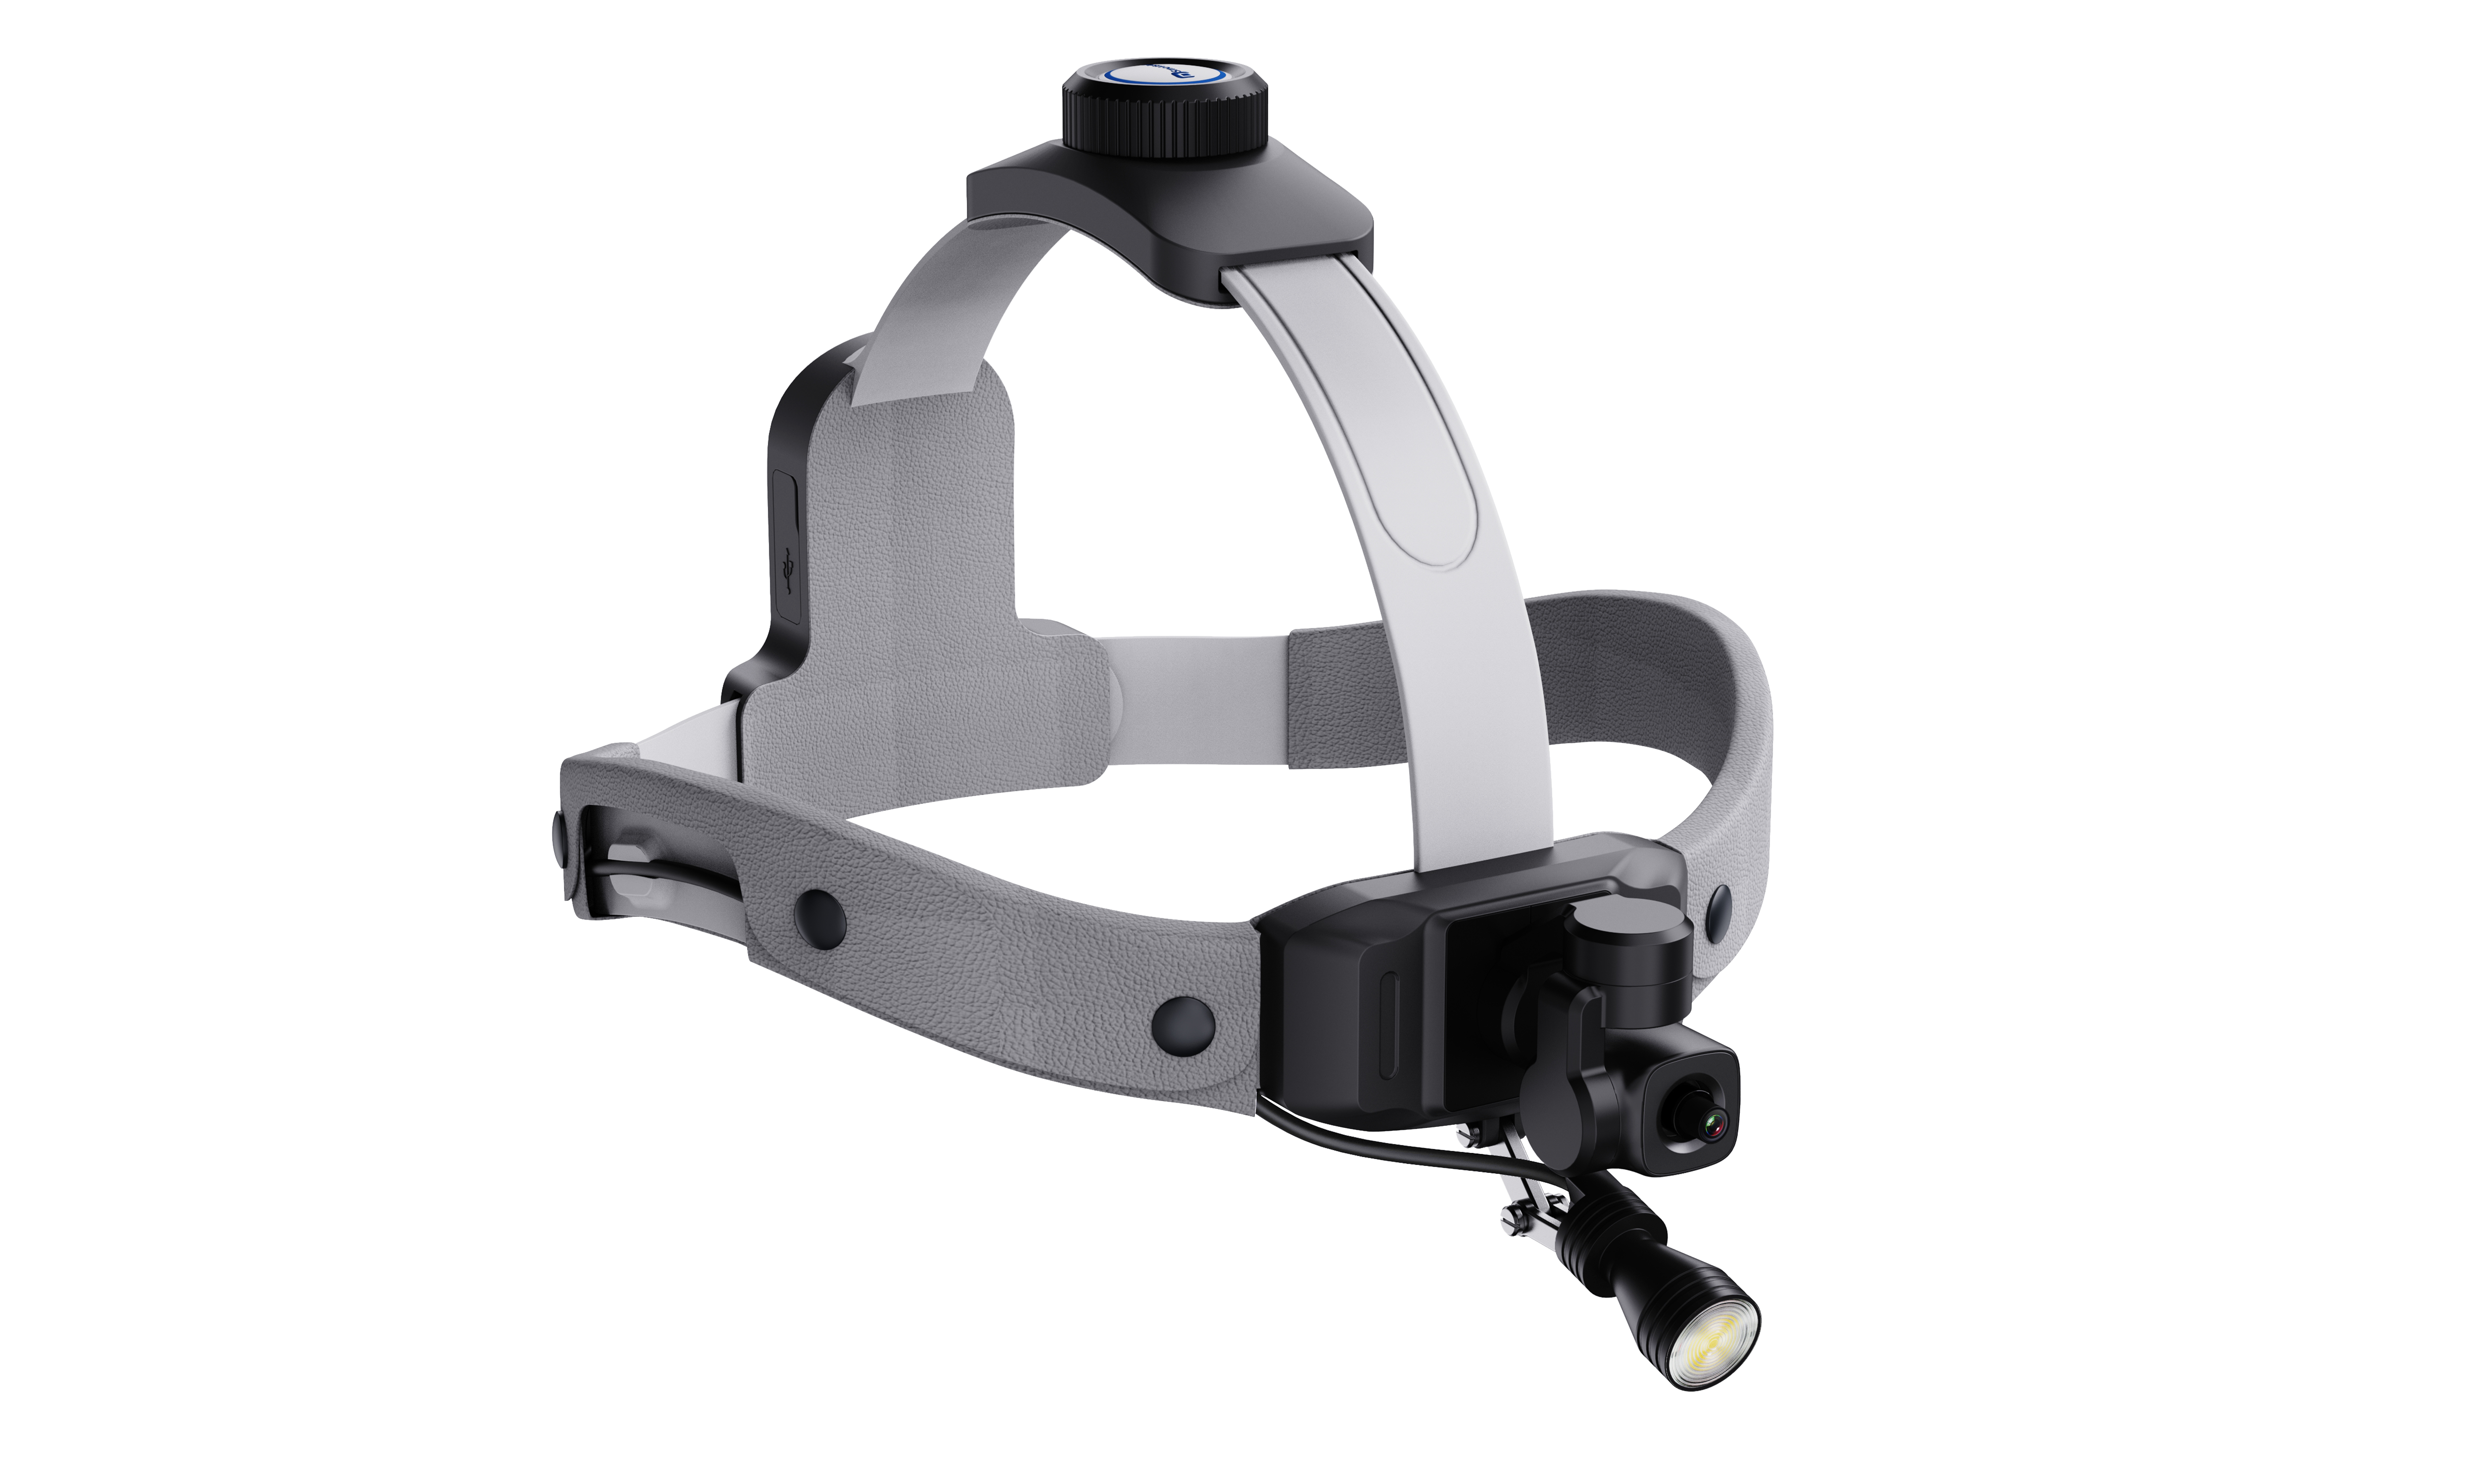
The 4K Stabilized Surgical Head Camera is a head-mounted imaging system designed to record the surgeon’s first-person view during clinical procedures, teaching sessions, and case documentation. The system combines a medical headlight form factor with a 4K camera module, stabilization, local recording,and real-time video output. Captures the operator’s point of view for procedure review and education.
Provides 4K recording and HDMI real-time output for display or external capture.
Supports quick on-site operation using the control box and optional wireless remote.
Suitable for departments that need hands-free image documentation and workflow simplicity.
1.1 Intended Use
This product is intended for image acquisition and video documentation during medical procedures. It is used as an auxiliary imaging device and does not perform diagnosis, treatment, monitoring, or life-support functions.
1.2 Typical Application Scenarios
Plastic and facial surgery
ENT and microsurgical procedures
Orthopedics and neurosurgery teaching
Procedure recording, training, conference display, and case archiving
2. Safety Information
Read this manual before first use and keep it available for reference.
Use the system only for image recording and display. Do not rely on it as a diagnostic or life-support device.
Before each case, confirm that the battery level, storage status, cable connections, and image output are normal.
Unless specifically labeled otherwise, accessories and outer surfaces are not supplied sterile. Follow your institution's infection-control requirements.
Do not expose the control box, charger, or connectors to liquids. Keep electrical parts dry during use and cleaning.
Do not disassemble, modify, or repair the device without authorization from the manufacturer.
Stop using the product if the housing is cracked, overheating is observed, or image output becomes abnormal. Use only approved power adapters and accessories to reduce the risk of damage or unstable operation.
Important operating note
For sterile procedures, determine locally whether the head-mounted assembly is worn outside the sterile field, covered with an appropriate protective barrier, or handled according to hospital protocol. The manufacturer does not replace institutional sterile technique requirements.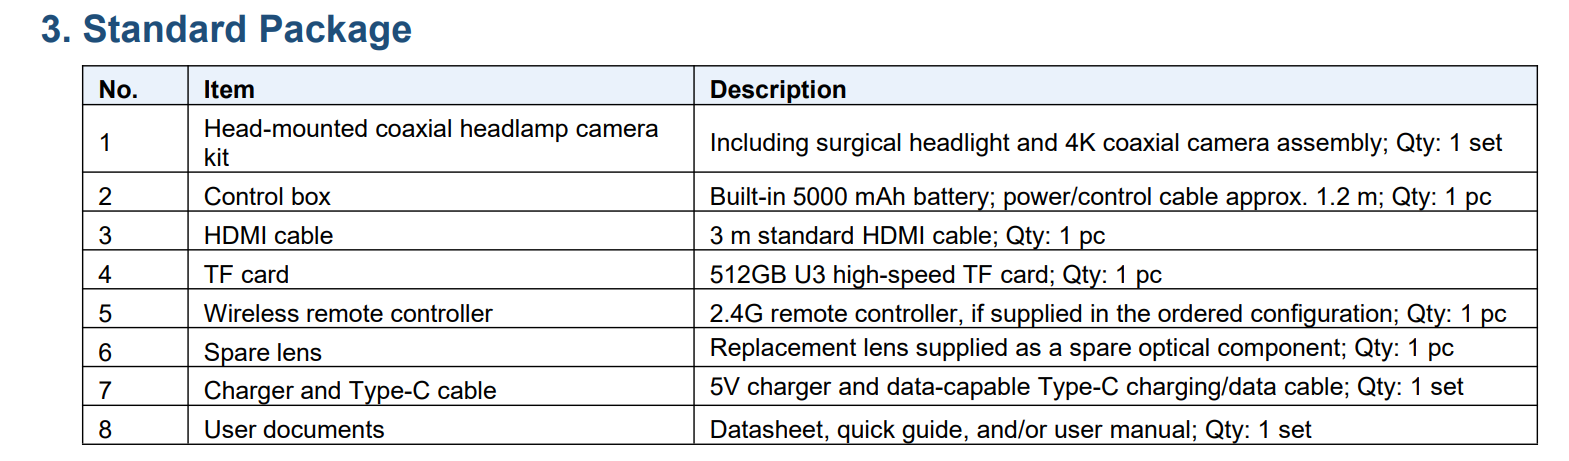
4. Product Structure
The following lists each core component, user notes, and main functions for standard operation:
|
Component
|
User notes
|
Main function
|
|
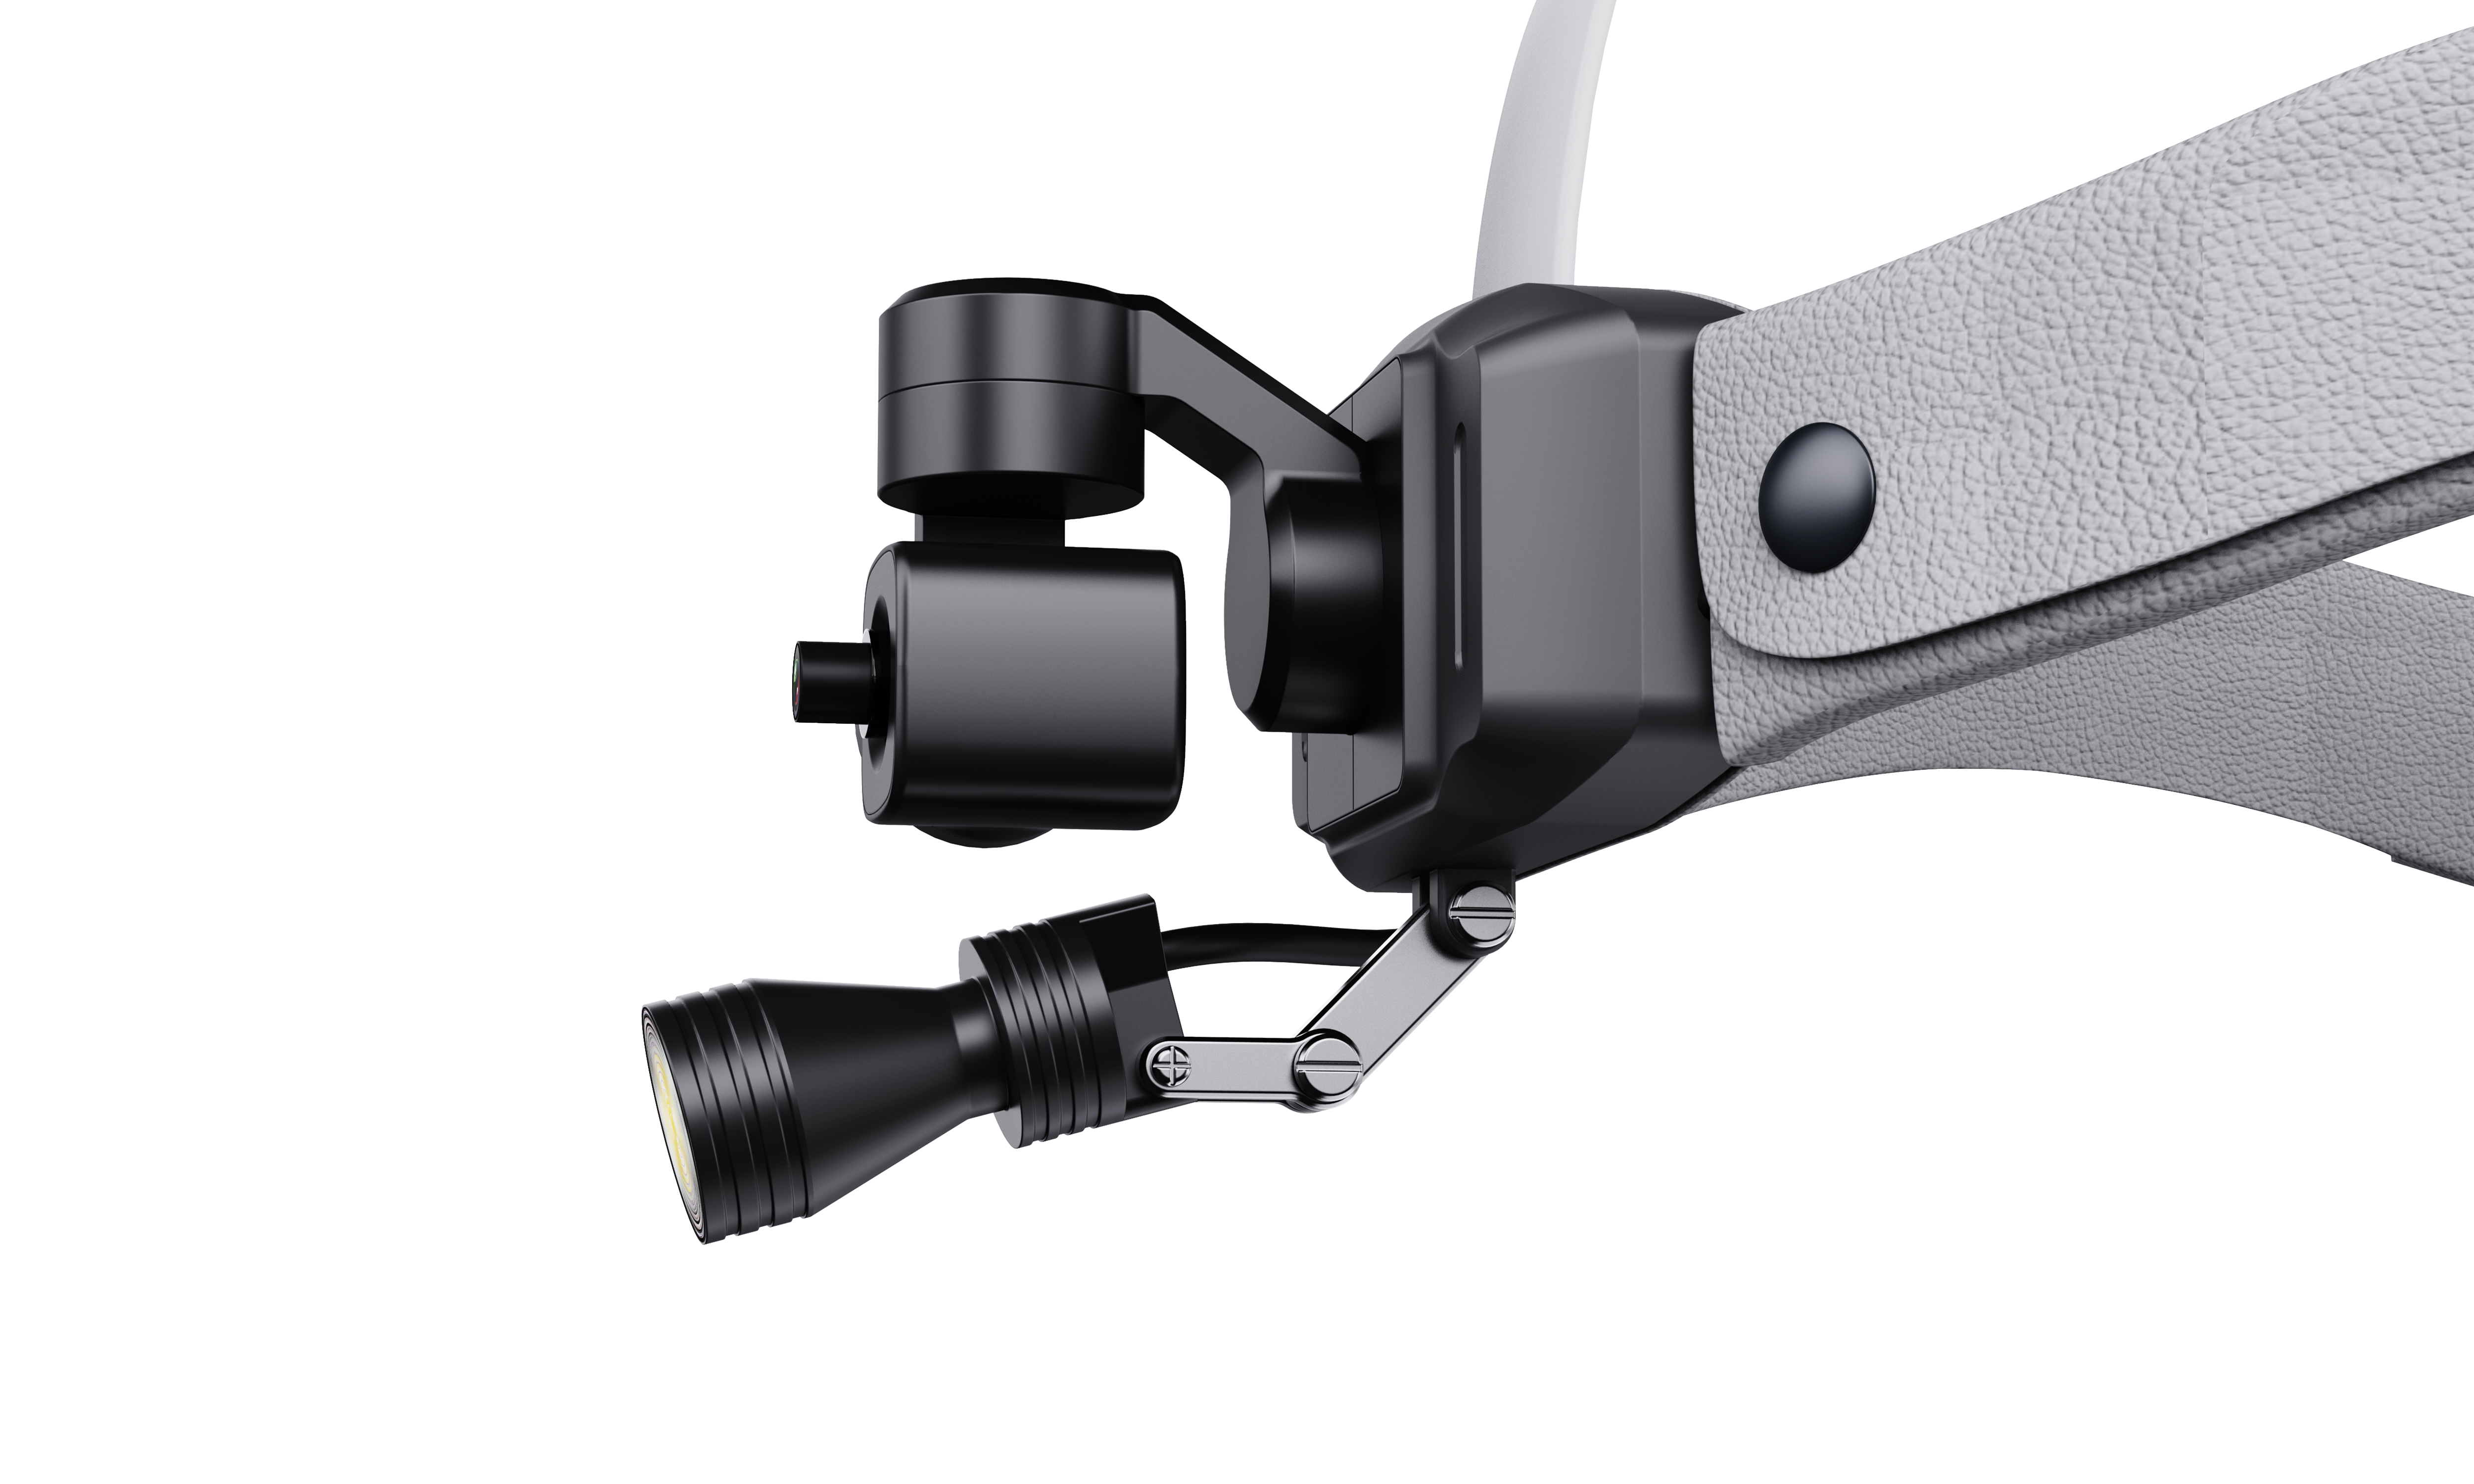
Head-mounted camera
|
Adjust before the procedure so the recorded view matches the intended operating field
|
Captures the surgeon’s first-person view, making it easier to record what the surgeon actually sees during the procedure
|
|
Stabilizing gimbal
|
Check smooth response before use; avoid impact, forced manual rotation, or rough handling
|
Keeps the image steadier during natural head movement, so the video is easier to review, teach, and share
|
|
Headlight assembly
|
Aim together with the camera for a more consistent working view
|
Provides procedural illumination to help the camera capture a clearer view of the surgical field
|
|
Headband / wearing frame
|
Tighten to a secure but comfortable fit before starting the case
|
Keeps the system stable on the surgeon’s head during routine movement
|
|
Control box
|
Place it in a secure pocket, belt clip, or nearby support position during use
|
Central control for power, recording, output, and basic operating status
|
|
HDMI output
|
Use a reliable cable and confirm display compatibility before use
|
Provides real-time connection to an external monitor, recorder, or teaching display
|
|
Wireless remote (optional)
|
Pair and test before entering the OR when used
|
Allows convenient image direction or function control during setup or use
|
5. Before First Use
Complete the following pre-use inspection and setup before clinical operation:
-
Inspect the package and confirm that all ordered items are present and undamaged.
-
Charge the control box fully before the first procedure.
-
Insert or confirm the recording storage medium if your configuration requires it.
-
Connect the head-mounted assembly to the control box securely.
-
Power on the system and confirm live image, recording response, and output connection.
-
Perform a short trial recording and playback check before clinical use.
Charging guidance
Use the supplied charger or the approved charging method specified by SMO Medical. During charging, place the control box on a stable and ventilated surface. A full charge is recommended before a scheduled list of cases. Do not cover the control box while charging.
6. Wearing and Positioning
-
Place the headband on the head and adjust the tightness so the assembly is stable but comfortable.
-
Align the headlight and camera toward a target area at the expected working distance.
-
If needed, fine-tune the vertical and horizontal orientation until the preview image matches the desired field.
-
Route the cable so it does not pull on the headband or interfere with the procedure.
-
Before scrubbing or entering the operating area, confirm that the image center and brightness are acceptable.
Practical positioning tips
-
For facial surgery, adjust the camera using a realistic head position instead of an exaggerated test posture.
-
Check image framing at the actual surgeon-to-patient distance.
-
If the image appears offset from the visual focus, make small physical alignment corrections before starting the case.
-
When possible, verify framing on an external monitor instead of relying only on assumptions from wearing position.
7. Basic Operation
Power on / off
-
Press the power key on the control box according to the labeled operating method.
-
Wait for the image system to initialize and confirm status indicators.
-
To shut down, stop recording first, then power off the system using the normal key sequence.
Start / stop recording
-
Confirm sufficient battery and available storage.
-
Press the record key once to start recording.
-
Check the recording indicator to confirm that recording is active.
-
Press the record key again to stop recording before shutdown or file removal.
Photo capture
If your configuration supports still image capture, press the corresponding photo key once. Confirm file generation during playback or file export.
Real-time HDMI output
-
Connect the HDMI output to a compatible monitor, recorder, or capture system before the procedure if possible.
-
Confirm image display, resolution compatibility, and cable stability.
-
For important teaching cases, perform a complete end-to-end signal test before patient use.
Wireless / remote functions
Depending on the ordered version, the system may support Wi-Fi transmission and/or 2.4G wireless remote control. If these functions are included, test pairing, signal stability, and workflow suitability before clinical use. Wireless functions should not replace local recording for important cases.
SMO Medical | Detailed User Manual | 4K Stabilized Surgical Head Camera
8. Main Technical Specifications
Core technical parameters of the 4K Stabilized Surgical Head Camera:
|
Item
|
Description
|
|
Video resolution
|
Up to 3840×2160 at 30 fps (depending on configuration and output mode)
|
|
Video output
|
HDMI real-time output
|
|
Recording
|
Built-in 4K local recording / storage according to supplied configuration
|
|
Stabilization
|
Integrated stabilizing system to help keep the surgeon’s view steadier during normal head movement
|
|
Control methods
|
Control box buttons; optional 2.4G wireless remote; optional wireless features depending on version
|
|
Power supply
|
Rechargeable battery in control box
|
|
Typical operating time
|
Approximately 6 hours depending on usage conditions and battery status
|
|
Application type
|
Head-mounted first-person surgical imaging
|
|
Use environment
|
Indoor clinical environment; follow institutional operating conditions
|